NextGen Updater v1.2 (PC Update)
Download notes
- If the download does not start (e.g. Google Chrome): right-click the download link and choose “Save link as…”
- Some browsers may show a warning — the files are not dangerous.
- Important: Extract/copy the files to a path without special characters (and ideally not a very long path).
Example: Don’t use the Desktop if your Windows username contains special characters (e.g. ÓóÉé).
Recommended: C:\NextGenUpdate\
Important: Use the correct cable
For updating, the display must be connected to the junction/connection box (using the display cable), and the Micro-USB cable must be plugged into the junction/connection box, then connected to your PC.
|
This cable is NOT for updating 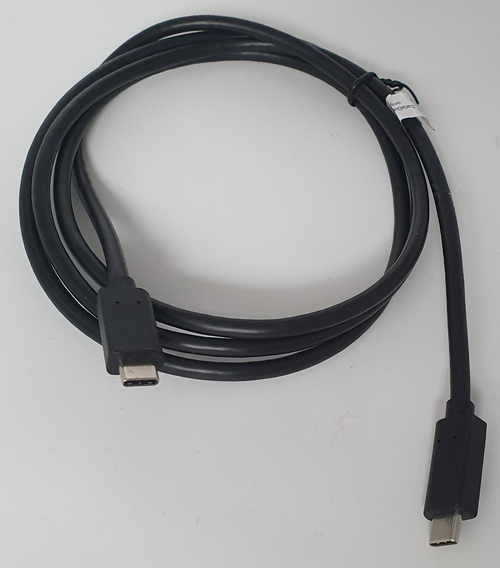 |
This cable IS for updating 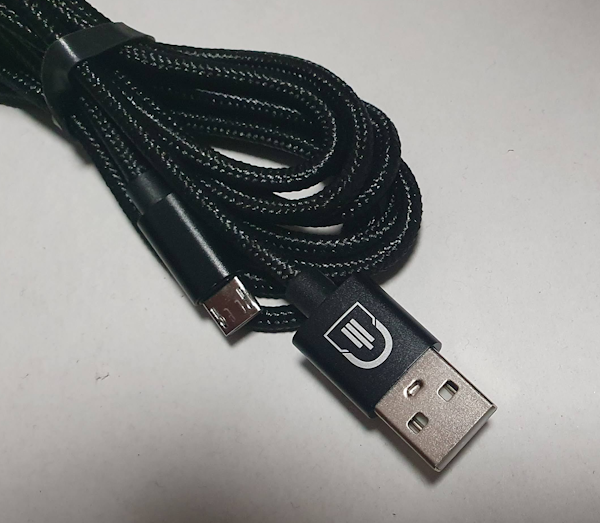 |
1) Download the NextGen Updater
Updater v1.2 (64-bit):
Windows 32-bit:
- Extract the ZIP file (recommended: C:\NextGenUpdate\).
- Run AK-NG-Updater.exe.
2) Download the update file
Download and extract the update file:
E46 Updates All other models
3) Perform the update
- Start the NextGen Updater on your PC.
- Connect the display (via the junction/connection box) to your PC using the USB Update cable.
- In the updater, click “Browse…” and select the update file.
If you get an error message:
The update file is most likely located in a path with invalid characters or the path is too long.
Copy the file to e.g. C:\ and select it again.
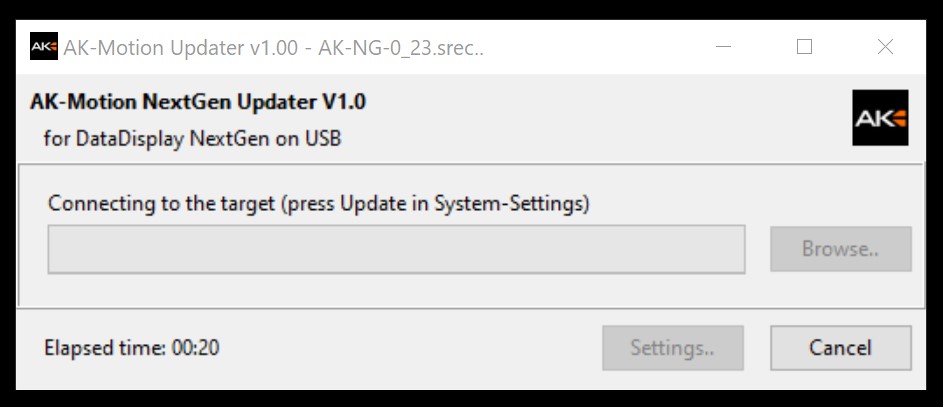
Important: Depending on your PC, loading the firmware into the updater may take a moment. Wait until you see:
“Connection to the target (press Update in System-Settings)”
If the display returns to the normal software while you are waiting, simply press “Update” on the display again.
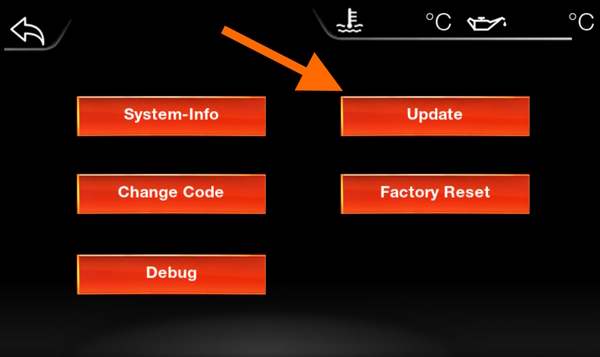
Start the update on the display: Settings → System → Update
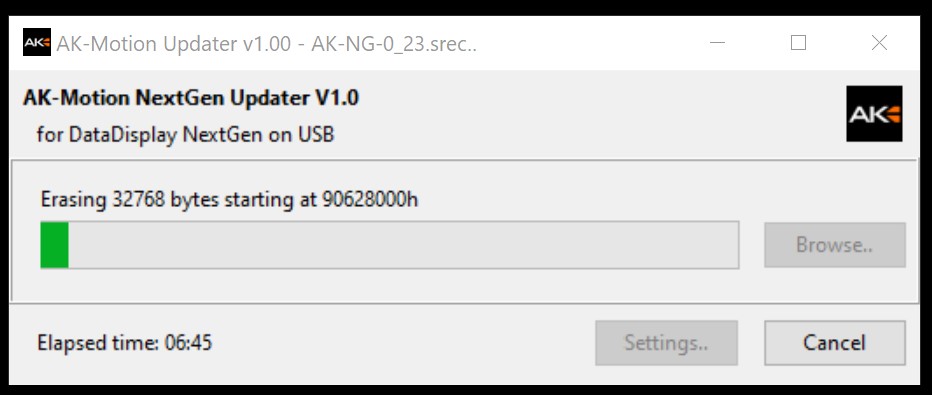
The display backlight indicates whether the device is in bootloader mode or an update is currently running. When the update is finished, the updater will close automatically.
Alternative start (if the display is not usable)
If the display is not usable for any reason (e.g. an incomplete/failed update), you can start the update process like this:
- E-series: Disconnect the JunctionBox from the vehicle so the device is powered only by the PC.
- F-series: Switch off vehicle ignition.
- Start the NextGen Updater and select the update file (as described above).
- Connect the USB cable to the PC, unplug it again within 5 seconds, then plug it back in.
- As soon as the updater shows “Erasing…”, the update is running.
If it does not start immediately: unplug and replug the USB cable again.
Only for bootloader versions below 0.6
Install the USB driver (one-time per PC)
Important: Connect the display to the PC only after the driver installation is completed.
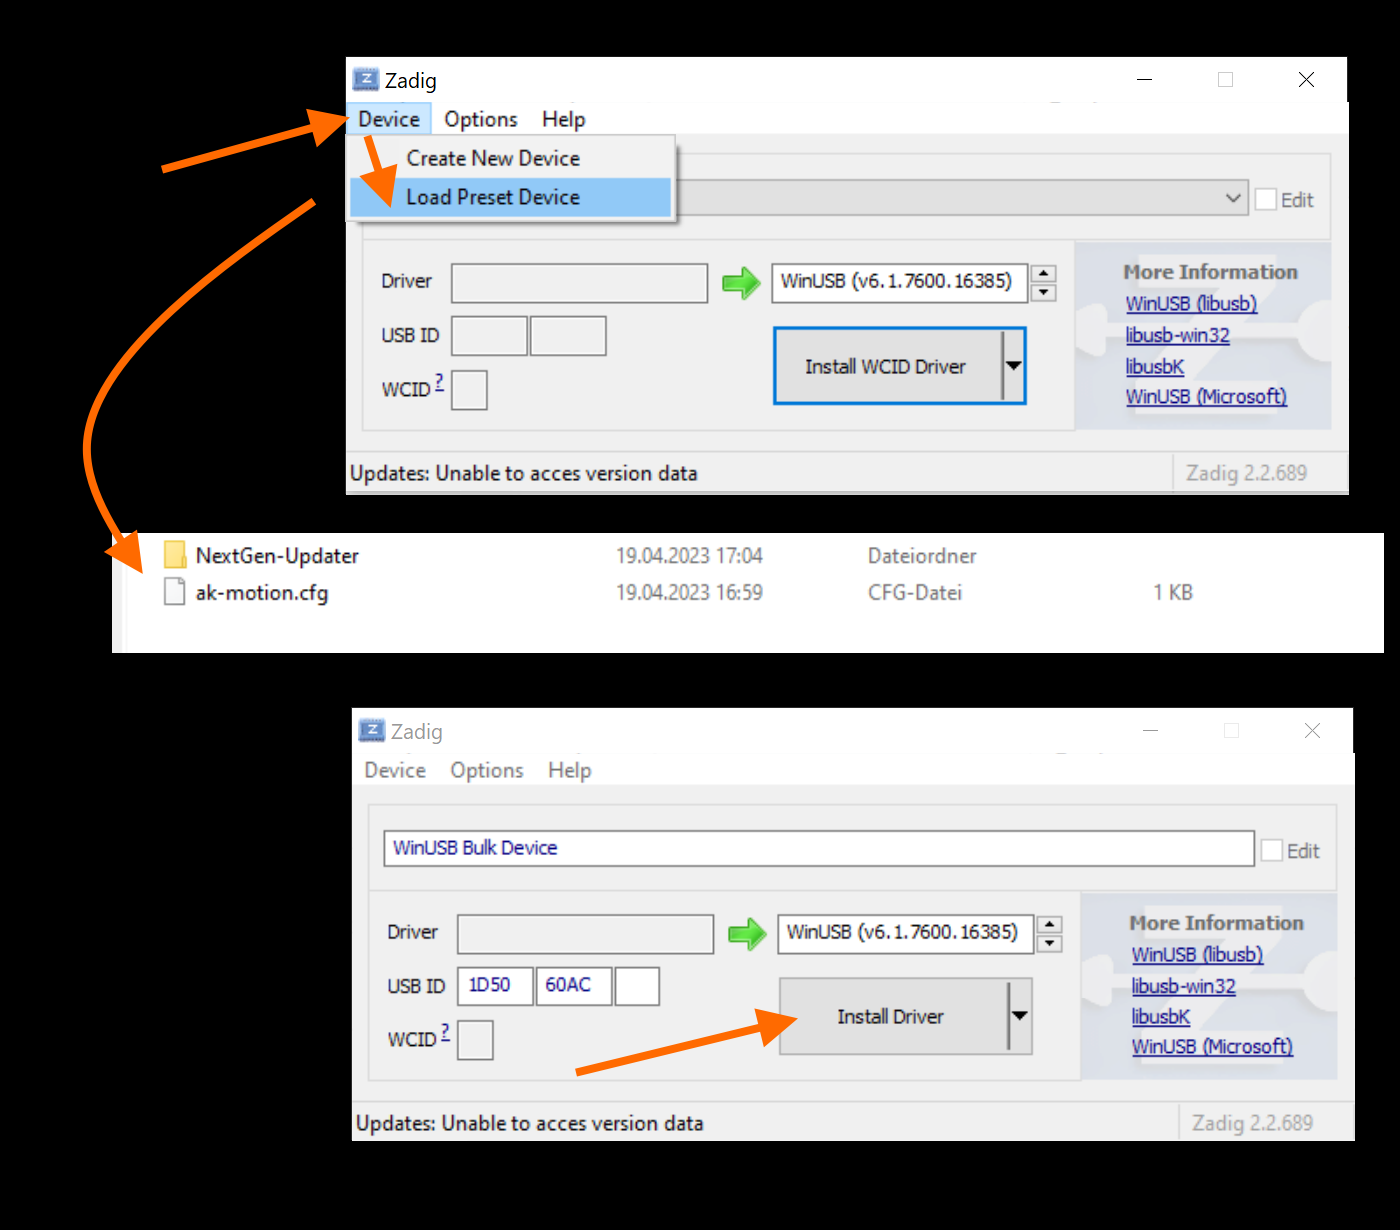
- Download and extract the driver package (recommended: C:\NextGen_usb_driver\).
- Run zadig_2.2.exe.
- Under “Device”, click “Load Preset Device”.
- Select “ak-motion.cfg” from the driver archive.
- If everything matches the screenshot, click “Install Driver”.