
AK-MOTION NEXTGEN
NextGen Updater v1.2
Update your NextGen display from a PC. Download the updater and the firmware for your model, then follow the steps below.
Before downloading
- Download not starting? Right-click the download link and select “Save link as …”. This may help in browsers such as Google Chrome.
- Your browser may display a warning when downloading the file.
- Use a folder path without special characters. Extract the files to a short path such as C:\NextGenUpdate\. The Desktop may be unsuitable if your Windows username contains characters such as Ó, ó, É or é.
Important: use the correct cable
The display must be connected to the connection box using the display cable. Connect the Micro-USB cable to the connection box, then connect it to your PC.
Do not use this cable for the update
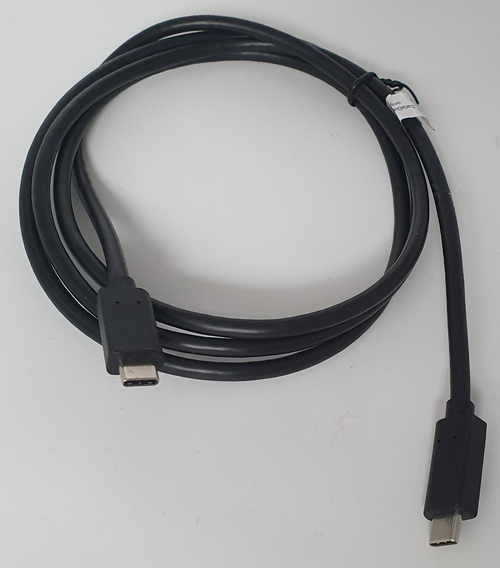
Use this cable for the update
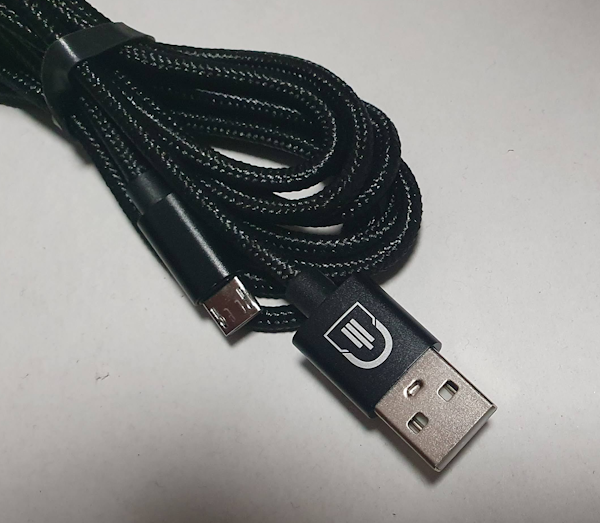
Update in three steps
STEP 01
Download NextGen Updater
Download Updater v1.2 (64-bit)Download 32-bit version
- Extract the ZIP file, for example to C:\NextGenUpdate\.
- Run AK-NG-Updater.exe.
STEP 02
Download the update file
Download the firmware for your model and extract the ZIP file.
STEP 03
Run the update
- Start NextGen Updater on your PC.
- Connect the display to your PC via the connection box and Micro-USB cable.
- Click “Browse …” in the updater and select the extracted update file.
- Wait until the updater displays “Connection to the target (press Update in System-Settings)”.
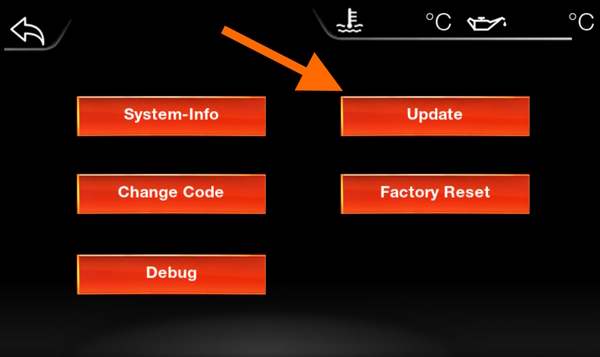
- On the display, select Settings → System → Update.
Error when selecting the file? The file path may contain special characters or be too long. Copy the update file directly to C:\ and select it again.
Reading the firmware may take some time, depending on your PC. If the display starts its normal software while you wait, press “Update” on the display again.
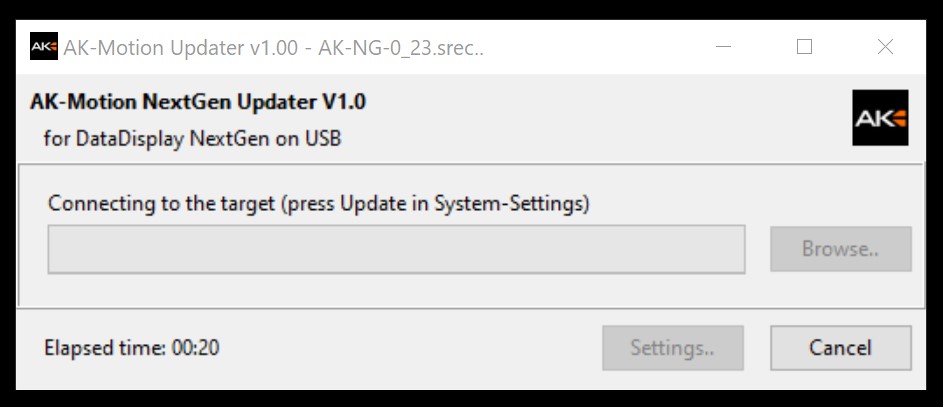
Start the update on the display
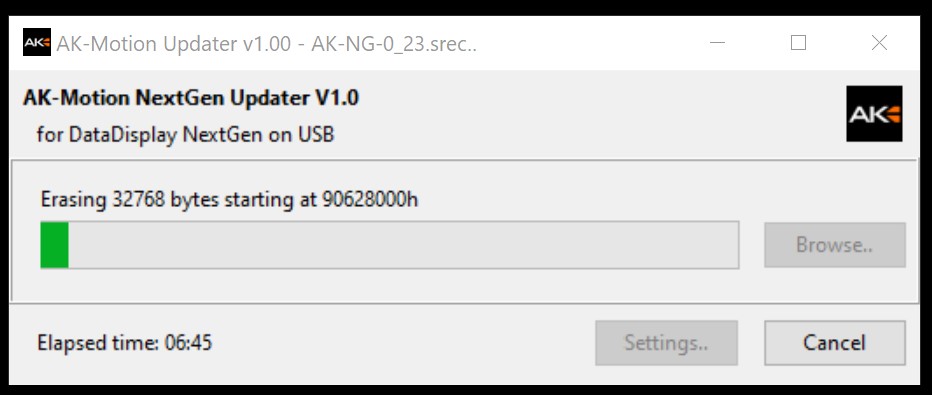
The DataDisplay backlight indicates whether the display is in the bootloader or an update is running. The updater closes automatically when the update is complete.
Alternative start method
If the display cannot be operated normally after an incomplete update, start the update process as follows:
- E-series: Disconnect the JunctionBox from the vehicle so power is supplied only through the PC.
- F-series: Switch off the vehicle ignition.
- Start the updater and select the update file.
- Connect the USB cable to the PC, unplug it within 5 seconds, then reconnect it.
- When the updater displays “Erasing …”, the update is running.
If it does not start immediately, unplug and reconnect the USB cable again.
Only for bootloader versions below 0.6
Install the USB driver
This is required only once per PC. Connect the display to the PC only after installing the driver.
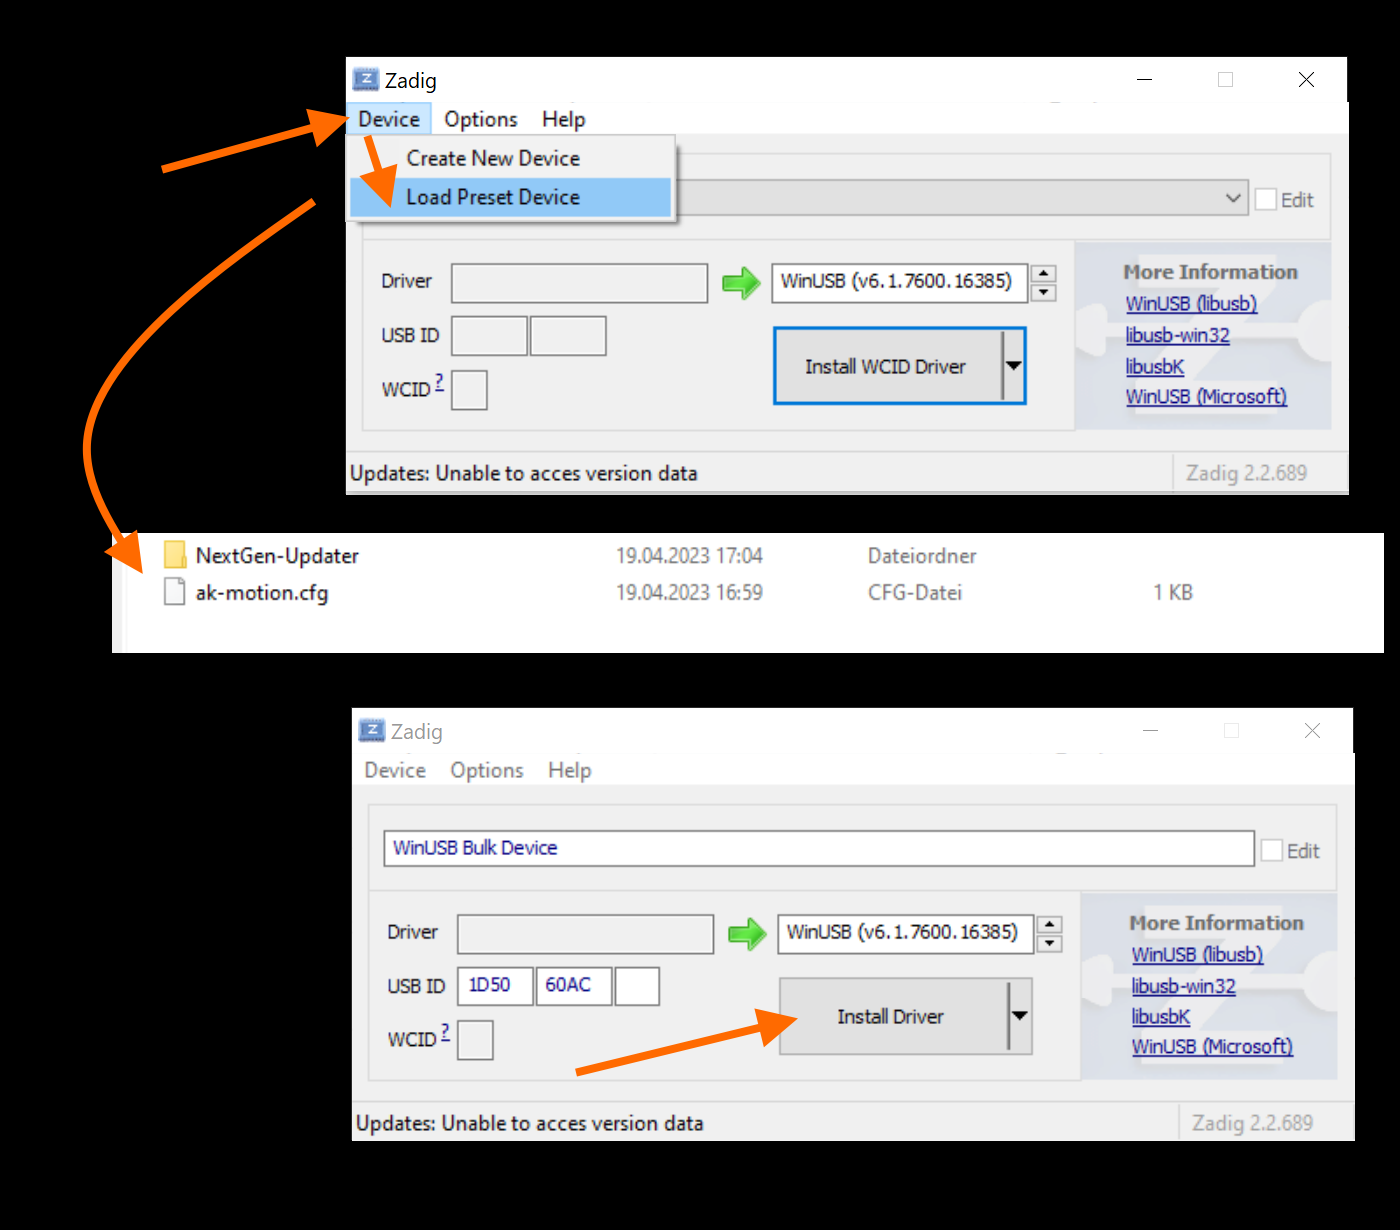
- Download and extract the driver package, for example to C:\NextGen_usb_driver\.
- Run zadig_2.2.exe.
- Under “Device”, click “Load Preset Device”.
- Select “ak-motion.cfg” from the driver archive.
- When the screen matches the image, click “Install Driver”.