Featured Questions
Hier ist die Update Anleitung für ein Update mittels Windows.
USB Update (USB Flash Drive)
Starting with version 1.53 (including Bootloader 1.0), you can install updates directly from a USB flash drive.
What you need
- USB adapter (female/female)
ORDER (Amazon affiliate link)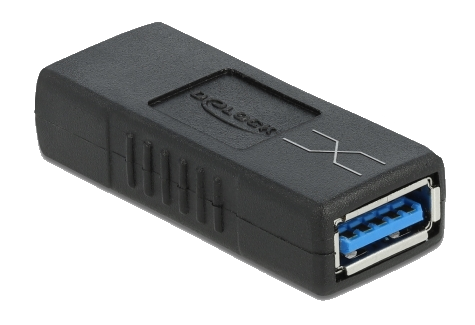
- USB flash drive
ORDER (Amazon affiliate link)
Prepare the USB drive
- Format the USB drive as FAT32 or exFAT (both are supported).
- Copy the update file to the USB drive (root directory only, not inside a folder).
- Rename the file to: AKNG.srec
- Note: A boot image created with the Bootlogo Creator can also be used.
Start the update
- Connect the adapter and USB flash drive to the USB update cable.
- On the display: Settings → System → Update
- Select USB Flash Drive (not “Computer”).
- The display turns off briefly – the update starts automatically.
Duration: Updating via USB typically takes about 4–5 minutes.
Status indication (backlight blink code)
- Very fast blinking: No USB flash drive detected. After about 10 seconds, the display boots the normal software again.
- Fast bright / slow dim: Update in progress.
Important notes if the update is interrupted
- If the USB drive is unplugged during the update, the bootloader restarts and waits again for a valid USB drive.
- If ignition is switched off or power is lost, the update must be started again.
- Important: If an update has started and gets interrupted, the device may no longer boot into the app and will stay in bootloader mode until a successful update is completed.
- If the software was already erased and the update is interrupted, the bootloader automatically switches between update modes every 5 seconds.
Slow blinking = Computer update
Fast blinking = USB Flash Drive update
Is the NextGen DataDisplay legal?
It depends on the installed software version and the enabled functions.
Street-Legal version
With the Street-Legal software version, the NextGen DataDisplay is a diagnostic and display device: it reads data from the vehicle’s onboard network, shows it, and can execute diagnostic functions. This version does not include exhaust flap control and is therefore generally uncritical for normal road use.
Full version
The Full version additionally allows exhaust flap control. Depending on the country/region and the vehicle, this function may not be permitted. In some cases, authorities may object to the mere presence of this function even if it is not activated.
How do I know if I have “Street-Legal” or “Full” installed?
In the main menu go to Settings → Extras:
-
Street-Legal: There is no menu item called “Exhaust Flap”.
-
Full: The menu item “Exhaust Flap” is present.
If “Exhaust Flap” is visible, legality may be questionable depending on local rules, even if the “Enable” checkbox is not set.
What is “Soundtuning” and does it make my display illegal?
“Soundtuning” is BMW’s name for the function that creates burbles/crackles in Sport or Sport+ mode. The NextGen DataDisplay cannot increase or activate this function. It can only make the vehicle quieter by disabling it.
No ECU maps are changed, and the NextGen DataDisplay cannot modify engine calibration in any way. The Soundtuning feature is not related to road safety regulations.
Notes
-
Legality can vary by country, region, vehicle model, and inspection rules.
-
Local laws and the assessment by inspectors/authorities are always decisive.
-
If you want maximum legal certainty, use the Street-Legal version.
-
For questions regarding legality in your country, we recommend contacting an inspection organization or the responsible authority in advance.
-
The vehicle owner/user is responsible for use on public roads.
Faq Sections
Hier ist die Update Anleitung für ein Update mittels Windows.
USB Update (USB Flash Drive)
Starting with version 1.53 (including Bootloader 1.0), you can install updates directly from a USB flash drive.
What you need
- USB adapter (female/female)
ORDER (Amazon affiliate link) - USB flash drive
ORDER (Amazon affiliate link)
Prepare the USB drive
- Format the USB drive as FAT32 or exFAT (both are supported).
- Copy the update file to the USB drive (root directory only, not inside a folder).
- Rename the file to: AKNG.srec
- Note: A boot image created with the Bootlogo Creator can also be used.
Start the update
- Connect the adapter and USB flash drive to the USB update cable.
- On the display: Settings → System → Update
- Select USB Flash Drive (not “Computer”).
- The display turns off briefly – the update starts automatically.
Duration: Updating via USB typically takes about 4–5 minutes.
Status indication (backlight blink code)
- Very fast blinking: No USB flash drive detected. After about 10 seconds, the display boots the normal software again.
- Fast bright / slow dim: Update in progress.
Important notes if the update is interrupted
- If the USB drive is unplugged during the update, the bootloader restarts and waits again for a valid USB drive.
- If ignition is switched off or power is lost, the update must be started again.
- Important: If an update has started and gets interrupted, the device may no longer boot into the app and will stay in bootloader mode until a successful update is completed.
- If the software was already erased and the update is interrupted, the bootloader automatically switches between update modes every 5 seconds.
Slow blinking = Computer update
Fast blinking = USB Flash Drive update
We recommend this simple program to connect to the display via the USB cable:
Connect the DataDisplay NextGen to the PC using the USB cable
Start the "HTerm" program.
Apply the following settings as shown in the picture:
Port: The port is different for everyone. If there are several to choose from, unplug the DataDisplay, click on the "R" button to the right of the port selection and see which port has disappeared. Reconnect the DataDisplay, click "R" again and select the port for the DataDisplay
Baud: 115200
Data: 8
Stop:1
Parity: None
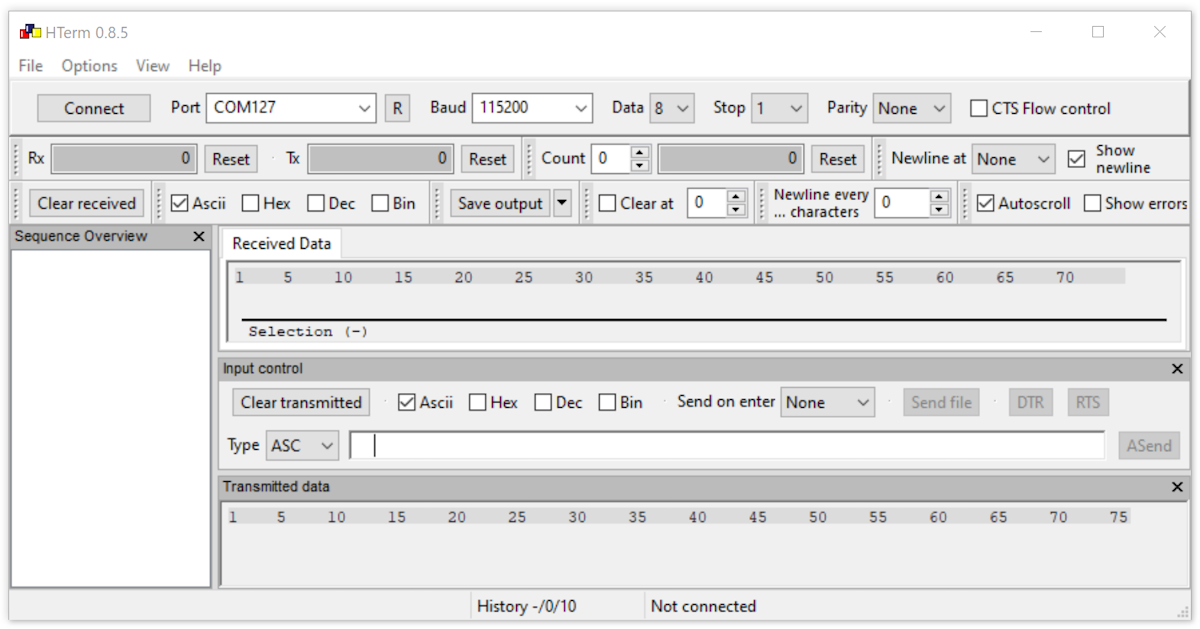
Press the "connect" button at the top left and the connection to the display will be established.
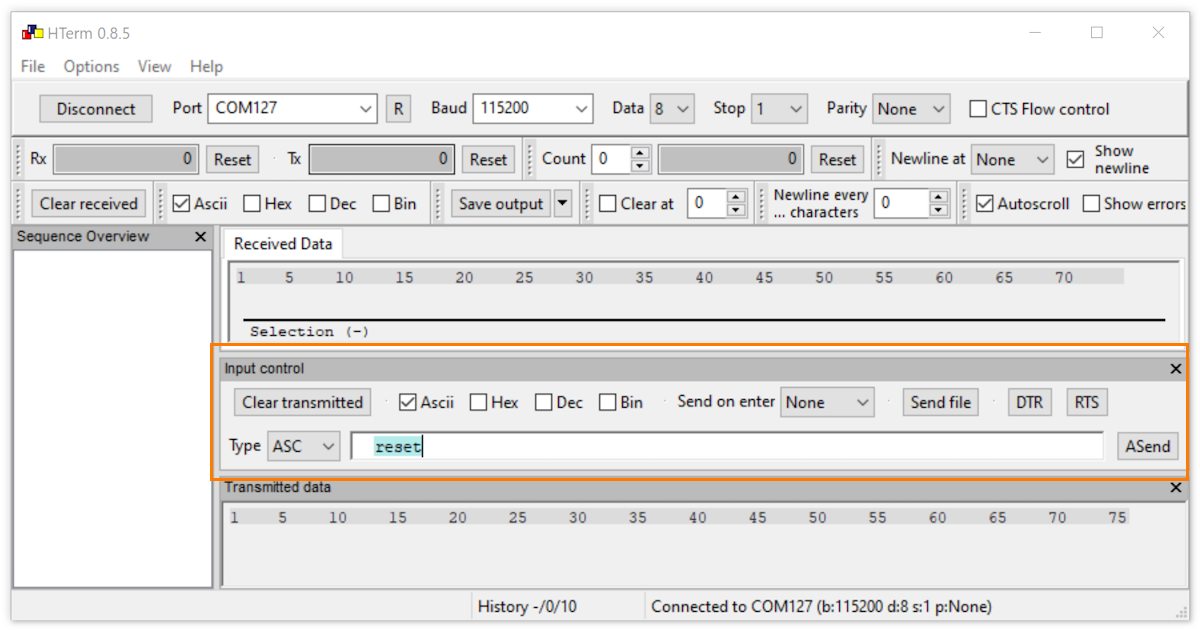
Under "Input control" check the Ascii only box.
Type: ASC
Enter the command "reset" in the input field (as shown in the picture) and press Enter on the keyboard.
The display is now set to factory settings and restarts.
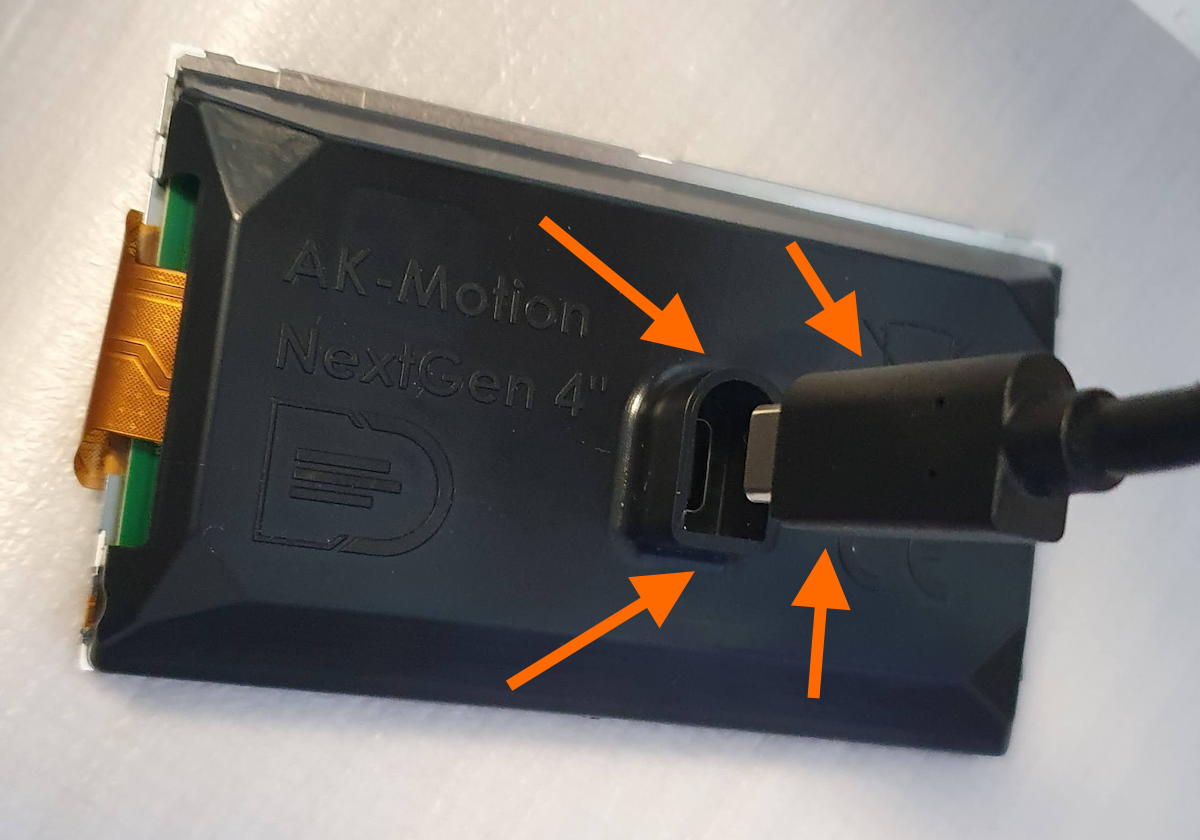
In most cases it is because the plug is plugged in the wrong way round either in the connection box or in the display. This means that the power supply is guaranteed, but not the CAN bus for the data.
Solution: Insert the cable the right way round (flat side to flat side and round side to round side).
Show More >>
Manual how to update
The display must be connected to the controller to perform the update, it is not enough just to connect the controller via USB to the laptop!
You find everything you need in the update package.
Prerequisite for an update is a Windows device (laptop, tablet, etc ...)
The following content is included in the update packages:
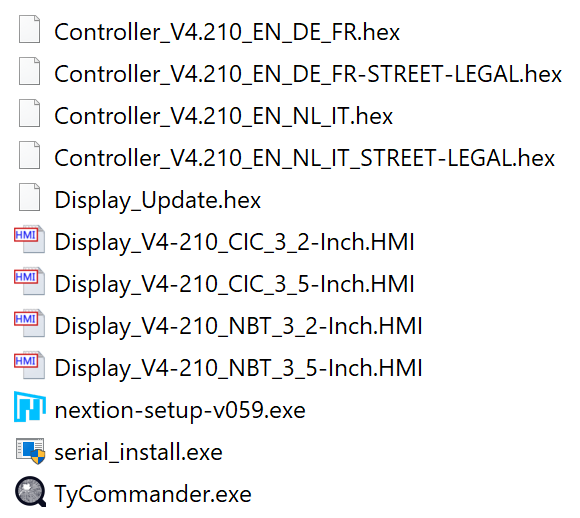
- The Controller-Version.hex - Different language packages as well as "Street-Legal" in which it is not possible to control the exhaust flap.
- The Display_Update.hex
- Various files for the interface
- The necessary "Nextion Editor" as setup to install
- Driver files "serial_install.exe" if it is the first update that is done.
- The "TyCommander"
Test connection with the PC:
First, the USB cable from the controller is connected to the PC.
Depending on the Windows version, it may be that the "serial_install.exe" must be executed (as admin) so that the drivers are installed. (One-time)
If Windows searches for a driver, you can see it in the task bar at the bottom right at the clock:

If the driver is missing, you can see it in the Device Manager of Windows:

Start TyCommander:
If the controller / DataDisplay is not listed here, the driver is probably missing, install it (serial_install.exe as administrator) and connect the controller again to the PC.

That's the way it should look if everything is OK:

Update Step 1:
Start TyCommander.
Note the COM port because this is still needed later (if there is more than one com port on the device, it may be that you have to select the one for the DataDisplay in Step 2).

Under "Options" click on "Browse" and select the file "Display_Update.hex".

Now click the button Upload with the arrow upwards.

It only takes a moment and the upload is complete.
A text should appear under "Serial" next to "Options": "3,2,1 READY TO UPDATE DISPLAY".

Now close the TyCommander (this is important because otherwise the next step can not be started successfully).
Update Step 2:
If this PC is being updated for the first time, the "Nextion Editor" must be installed. Execute file from the update package "nextion-setup-vXX.exe".

Important:
If an error message appears after installation that a file "VCRUNTIME140.dll" is missing, a Microsoft program must be downloaded and installed:
visual c++ 2015 redistributable
The 32 bit version is required (no matter which Windows version). "vc_redist.x86.exe"
Now select the appropriate display version.
There are two different sizes: 3.2 inches and 3.5 inches.
3.2 inch displays are installed in: E9X, E6X, F10
3.5 inch displays are installed in: E7X, E8X, F2X, F3X, F8X
If different styles are offered, this can be recognized by NBT or CIC in the file name.
Open the desired file with a double-click.
The Nextion Editor starts.
OPTIONAL STEP: Swap boot image for your own:
Switch left bottom to "Picture":

The first picture is the boot picture.
Right-click on the factory boot image and a menu will appear.
Select "replace" here and select your own picture.

The following image sizes must be used:
3.2 inch displays: Width x Height: 400 x 240 Pixel
3.5 inch displays: Width x Height: 480 x 320 Pixel
It should have the image format JPG.
OPTIONAL STEP END:
Only for right hand drive cars (RHD):
For right-hand drive vehicles, the display must be rotated by 180 °:
To do this, open the "Device" menu and change from 270 ° to 90 ° and confirm with OK.


Click Upload at the top of the menu:

A new window is opening up.
Select the com port (which was in the TyCommander) and then press the "Go" button.

The upload starts. The progress is displayed here and on the display itself also a display shows the progress.

When the upload is done, exit the window with "Exit" and close the Nextion Editor.
Update Step 3:
Now start the TyCommander again.
This time under Options -> "Browse" select the Controller_Version.hex file from the update package and confirm with Upload.
Since version 4.106, languages are separated. Choose suitable hex file.
EN = English, DE = German, FR = French, NL = Dutch, IT = Italian

The update is now finished.
Have fun with it.
Note:
Should something go wrong during the update, e.g. During the upload with the Nextion Editor the DataDisplay has to be made powerless once so that you can carry out the update procedure again:
Disconnect USB connection.
For the F-series, it is sufficient to switch off the ignition and wait a few seconds.
For the E series it takes about 30-40 minutes when the vehicle is locked (and not reopened) until the DataDisplay is completely powerless. Alternatively, you can also briefly disconnect the controller from the vehicle or disconnect the battery of the vehicle.
If the DataDisplay is locked for the first time, a PIN must be assigned.
If the PIN has been forgotten or something went wrong, the PIN can also be reset via the USB connection (factory setting is executed).
Connect the DataDisplay to a Windows device and start the TyCommander.
If the controller is not displayed (picture number 1) the driver is probably missing.

2: Serial must be activated
3: Switch to the Serial tab
4: Enter the command "reset"
5: Press the "Send" button.
It can happen that the controller software is deleted due to an overvoltage.
In this case, the display is still working (with graphics) but no more data is sent from the controller to the display.
You can also tell by the fact that the LED on the controller (you can see it through the slots in the housing) no longer flashes.
In this case, the controller must be given software again.
This is not initially recognized by the laptop. In order to make it visible again in the TyCommander, the cover must be removed (remove the Phillips screws on the bottom and take off the cover).
Connect the controller to the laptop using the USB cable and start TyCommander (this is included in every update package).
Now the “boot pins”, i.e. the soldering eyes labeled “boot”, have to be briefly bridged. Preferably with a piece of cable or something else that conducts electricity.
If the bridge was successful, the controller appears in TyCommander and you can (must) upload a hex file from the update package.

Show More >>