I forgot the unlock pin. What can I do? (Factory Settings)
We recommend this simple program to connect to the display via the USB cable:
Connect the DataDisplay NextGen to the PC using the USB cable
Start the "HTerm" program.
Apply the following settings as shown in the picture:
Port: The port is different for everyone. If there are several to choose from, unplug the DataDisplay, click on the "R" button to the right of the port selection and see which port has disappeared. Reconnect the DataDisplay, click "R" again and select the port for the DataDisplay
Baud: 115200
Data: 8
Stop:1
Parity: None
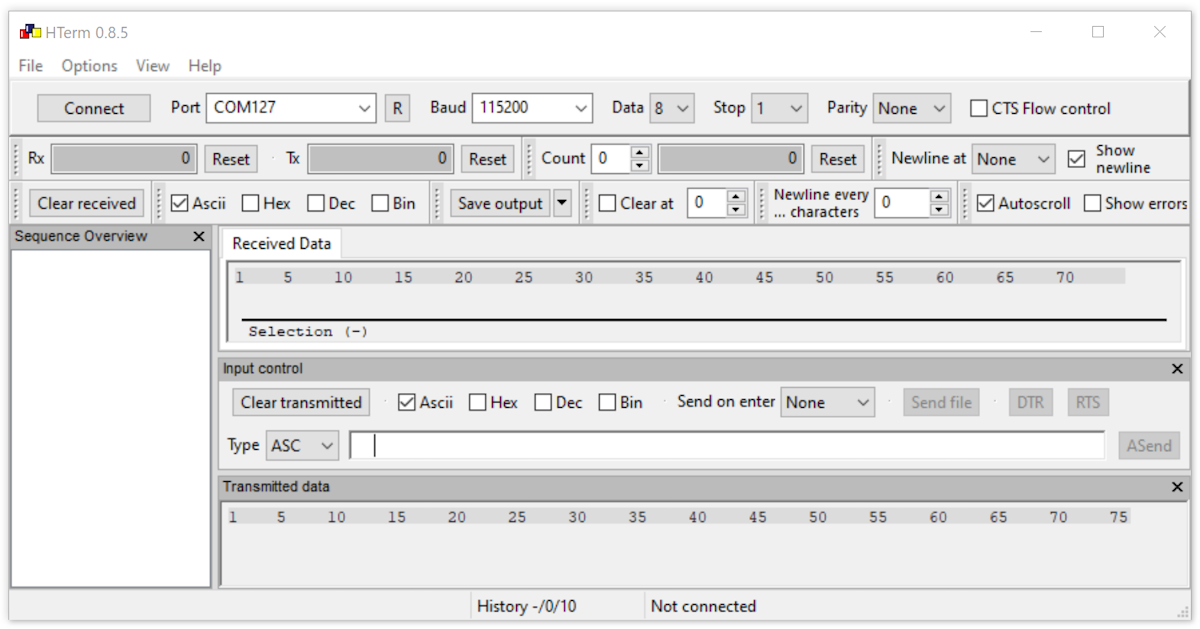
Press the "connect" button at the top left and the connection to the display will be established.
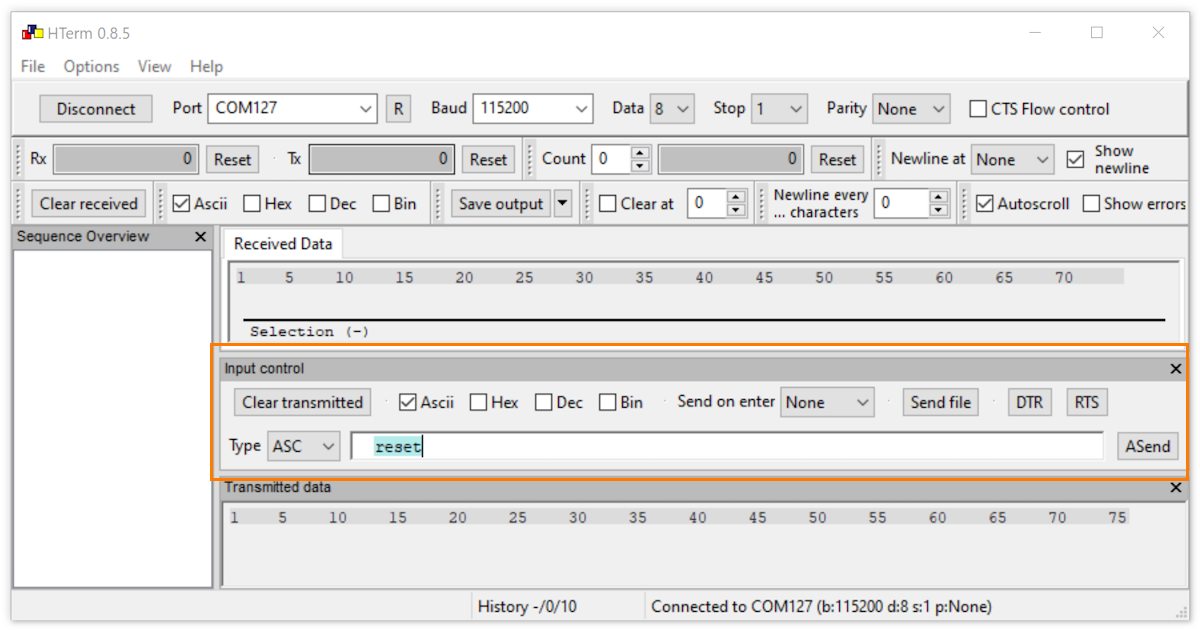
Under "Input control" check the Ascii only box.
Type: ASC
Enter the command "reset" in the input field (as shown in the picture) and press Enter on the keyboard.
The display is now set to factory settings and restarts.
FAQs From Same Category
Hier ist die Update Anleitung für ein Update mittels Windows.
USB Update (USB Flash Drive)
Starting with version 1.53 (including Bootloader 1.0), you can install updates directly from a USB flash drive.
What you need
- USB adapter (female/female)
ORDER (Amazon affiliate link)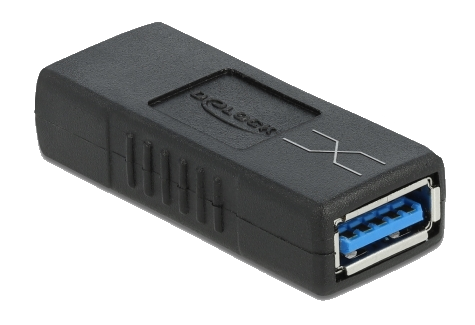
- USB flash drive
ORDER (Amazon affiliate link)
Prepare the USB drive
- Format the USB drive as FAT32 or exFAT (both are supported).
- Copy the update file to the USB drive (root directory only, not inside a folder).
- Rename the file to: AKNG.srec
- Note: A boot image created with the Bootlogo Creator can also be used.
Start the update
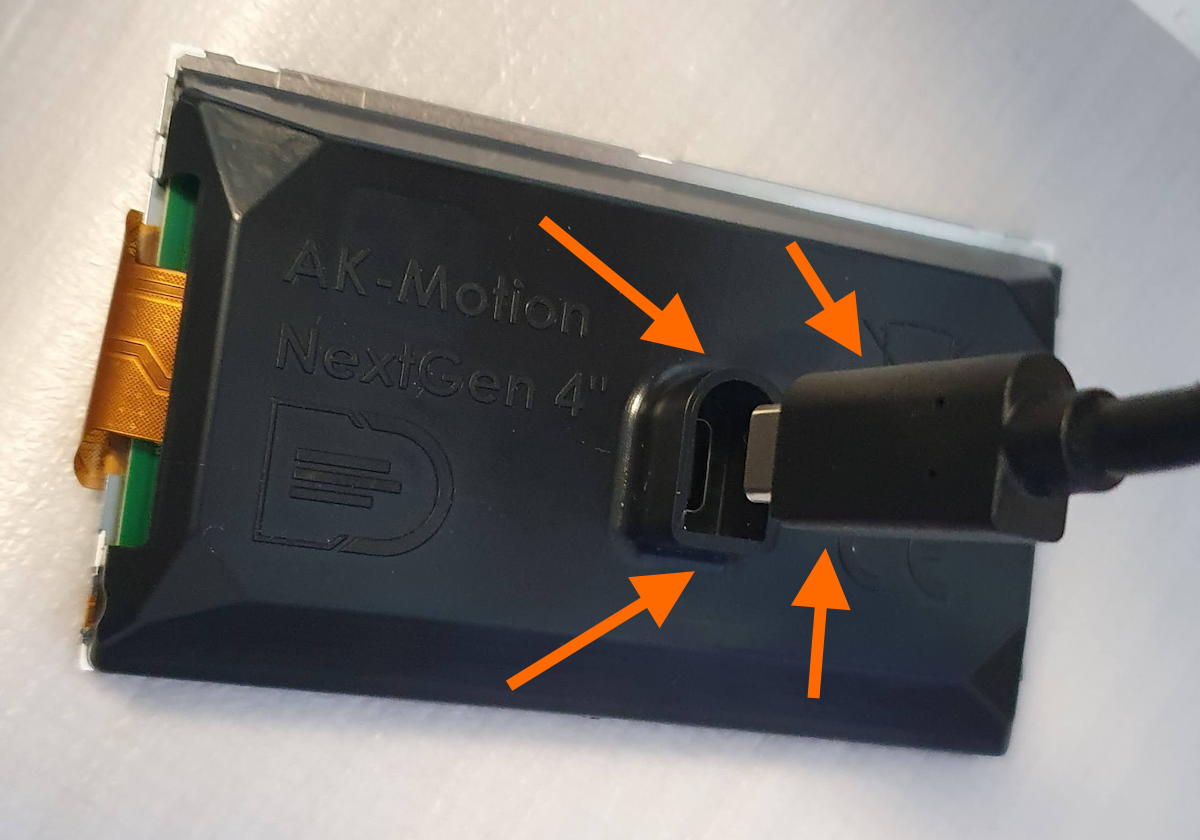
- Connect the adapter and USB flash drive to the USB update cable.
- On the display: Settings → System → Update
- Select USB Flash Drive (not “Computer”).
- The display turns off briefly – the update starts automatically.
Duration: Updating via USB typically takes about 4–5 minutes.
Status indication (backlight blink code)
- Very fast blinking: No USB flash drive detected. After about 10 seconds, the display boots the normal software again.
- Fast bright / slow dim: Update in progress.
Important notes if the update is interrupted
- If the USB drive is unplugged during the update, the bootloader restarts and waits again for a valid USB drive.
- If ignition is switched off or power is lost, the update must be started again.
- Important: If an update has started and gets interrupted, the device may no longer boot into the app and will stay in bootloader mode until a successful update is completed.
- If the software was already erased and the update is interrupted, the bootloader automatically switches between update modes every 5 seconds.
Slow blinking = Computer update
Fast blinking = USB Flash Drive update
In most cases it is because the plug is plugged in the wrong way round either in the connection box or in the display. This means that the power supply is guaranteed, but not the CAN bus for the data.
Solution: Insert the cable the right way round (flat side to flat side and round side to round side).
The flickering means that the bootloader is active and can accept an update.
If the display runs for some time, the bootloader is told that the application is ok and running.
The actual software (application) is then started immediately and the display no longer flickers when switched on.
If you frequently turn the ignition off and on again, it flickers again because the application hasn't run long enough.
This is a safety feature so that the display can always be updated should something go wrong.
An external sensor is connected to the junction box. Our recommendation for an oil pressure sensor is an original BMW sensor:
BMW part numbers:
Sensor: M12 x 1.5: 8614494
Housing with contacts: 61132359997
Danger. There are many different sensors, some are combined with pressure and temperature and don't work! Others have a different assignment.
This example uses the sensor that is also used in the B47 or B58 engine, among others.
A 3-pin cable is also required, here we recommend a cable cross section of 0.5mm².
Sensor pin 1 is connected to pin GND on the junction box
Sensor pin 2 is connected to pin A1 on the junction box
Sensor pin 3 is connected to pin 5V on the junction box

Next the sensor needs to be adjusted.
To do this, go to Settings - External - Analog A1 Setup (or up to version 0.45 oil pressure sensor):
The engine must not run for this purpose.
Select whether the sensor should measure oil pressure or boost pressure.
The voltage and pressure coming from the sensor appear below (it should be around 500mV).
The pressure must now be set to 0.0 bar. To do this, press the text and value "Cal:" at the top and enter a value, e.g. 10, and confirm with #.
Increase the value until the pressure is 0.0 bar.
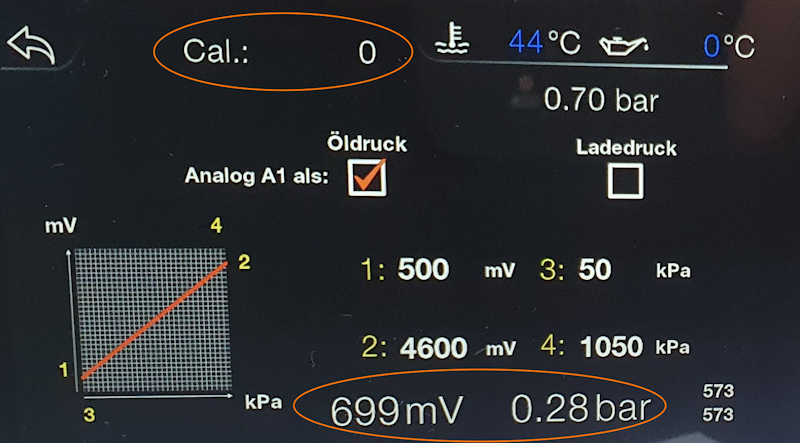
If another analog sensor is used, the data must be entered as to how much voltage there is, little pressure and how much voltage is used to output a lot of pressure. These can be changed by pressing the values. The picture shows the settings of the pressure sensor mentioned above, which can be used for oil pressure and boost pressure.